
WordPress ins and outs
Part 5: WordPress ins and outs
WordPress can be a bit tricky sometimes, so we’ve compiled a list of tips and tricks…
1. How to change the status of a team member
To change the status of a team member or a contributor, you will need to log in as Judy – ask us for the login details.
Once you’re logged in, go in the Dashboard, then click on ‘Users’. Type the email address or username of the team member in the search field. They should appear in the list – click on ‘Edit’ beneath their name.
– For a contributor:
In the ‘Role’ dropdown list, select ‘Author’.
In ‘Extra User Fields Settings > Contributor Type’, tick ‘Author’.
– For a team member:
In ‘Role’, select ‘Editor’.
In ‘Extra User Fields Settings > Contributor Type’, tick ‘Editor’.
Save changes.
2. How to edit which articles appear on the home page
In the Dashboard, click on ‘Home Page’ on the left-hand menu bar.
On the next page, click on ‘Home Page’ again.
In the ‘Custom Fields’ section of the next page, you’ll notice that there are headings denoting ‘Sponsored Box’ 1 through to 9. Beneath each bolded heading should be the names of one or a handful of articles.
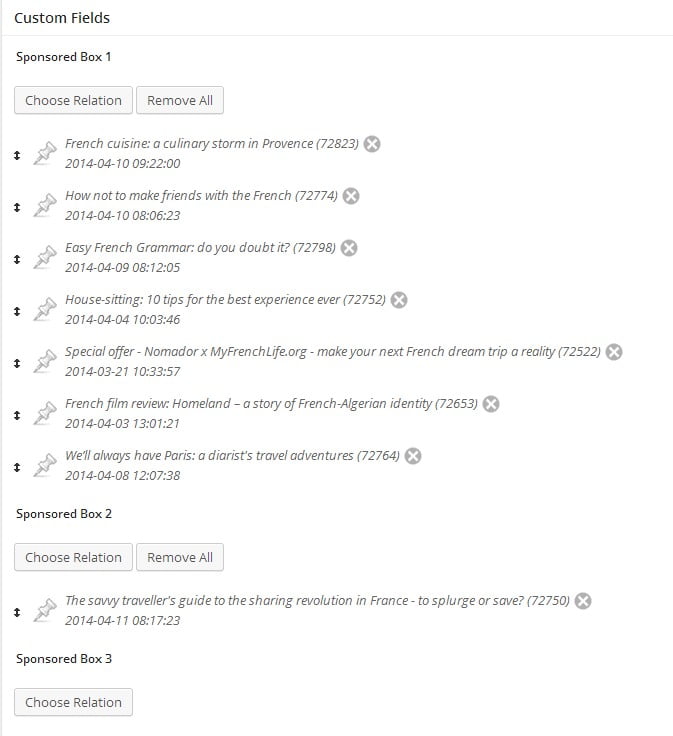
Sponsored Box 1 appears at the top of the homepage, and is a slider loaded with 7-8 articles.
Sponsored Box 2 appears beneath and only contains one article.
Sponsored Boxes 3 – 5 each represent individual article in the order of most recently published. Leave these sections blank – they’ll fill automatically.
Sponsored Box 6 is the featured article section beneath the first group of three boxes. Choose one article to feature here – often it’s where we place our ‘What’s on in Paris’ articles.
Sponsored Boxes 7 – 9 are also individual boxes.
To add an article to a particular section…
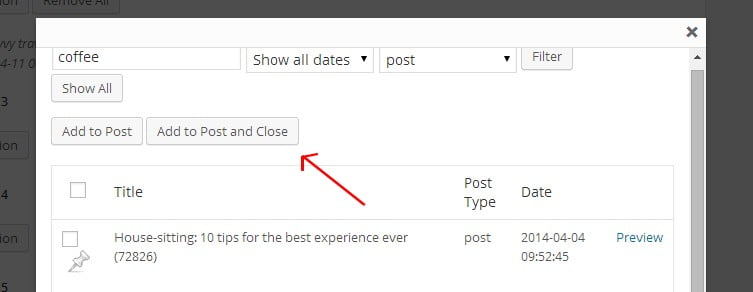
Click the ‘Choose Relation’ button beneath the relevant ‘Sponsored Box #’ heading.


Click on the ‘date’ column to sort articles by the most recently published (NB: you might have to click this a few times to make it sort correctly).
Scroll down the list, or navigate to subsequent pages using the numbers at the base of the list.
Find the article you’re after and tick the box beside it.

Scroll back up to the top, and click ‘Add to Post and Close’.
The article will then appear in the list beneath ‘Sponsored Box #’, and the other articles within this section.

Once you’re done, click the blue ‘Update’ button to the right so that these changes appear on the website.
3. Quick WordPress HTML guide
Click on the ‘Text’ tab at the top of the article box. This will display the HTML of your body text.
There should only be a handful of HTML tags in the body – any others will cause problems and make the text appear abnormal.
NB: all HTML tags have an ‘open’ and ‘close’ tag. The close tag has a forward slash (/) in it.
The only HTML tags you should see, and will need to identify are as follows:
<h2> Sub-heading </h2>
This puts text into Heading 2 font. (If it’s Heading 1 or 3, it will have these numbers instead of the ‘2’.)
<b> Your text here </b>
This makes text bold.
<a href=“http://www.yourlinkhere.com”> Your text here here </a>
This is what a link HTML code looks like. ‘Your text here’ is indicative of the text the link is behind.
<img src= “http://www.yourimageURLhere.com” alt=”” />
This is what an image HTML code looks like. It might also have other elements within the two angle brackets that change the size or alignment, or add an ‘alt’ tag.
<address> References here </address>
This makes text ‘Address’ font (la police ‘Address’). If you’re having trouble making text Address font in ‘Visual’ mode, try manually inserting it in ‘Text’ (HTML) view.
This tag ONLY appears where the text has been made a different colour:
<span style= “color: #d10a26;”> Image credits here </span>
#d10a26 is called a ‘Hex colour code’. This particular one is our default red colour – in text that is coloured Gray, you’ll see a different code.
If you see a ‘span’ tag anywhere else in the article be sure to remove it.
<sup>1</sup>
This makes the number a superscript (for references).
If you see this tag, remove it
<div> </div>
It will only get in the way – it doesn’t have any particular purpose for us!
4. How to make an image a link:
There are three options:
1. Select the picture and click the link button. Then, add the URL into the correct field.
2. By ‘editing’ the picture and changing the “link to” URL.
3. Coding in WordPress:
<a href=”http://yourdesiredurl.com”> <img src=”yourPic.jpg“> </a>
And an example:
<a href=http://www.Nomador.com> <img class=”aligncenter size-full wp-image-72530″ alt=”Special offer – Nomador.com MyFrenchLife.org – French dream trip – savvy traveller – House-sitting” src=”https://www.myfrenchlife.org/wp-content/uploads/2014/03/dontjuststandthere2.png” width=”600″ height=”326″ />
</a>
5. If you accidently publish an article
If you ever accidently publish an article, don’t panic!
Open the article in the dashboard, and in the top right hand corner, look for the ‘Visibility’. Click on ‘Edit’, and switch to ‘Private’. Click on ‘OK’.
The article is still published but it won’t appear on the website. Make sure to tell us this happened, so that we take note of the Visibility status of the article.